

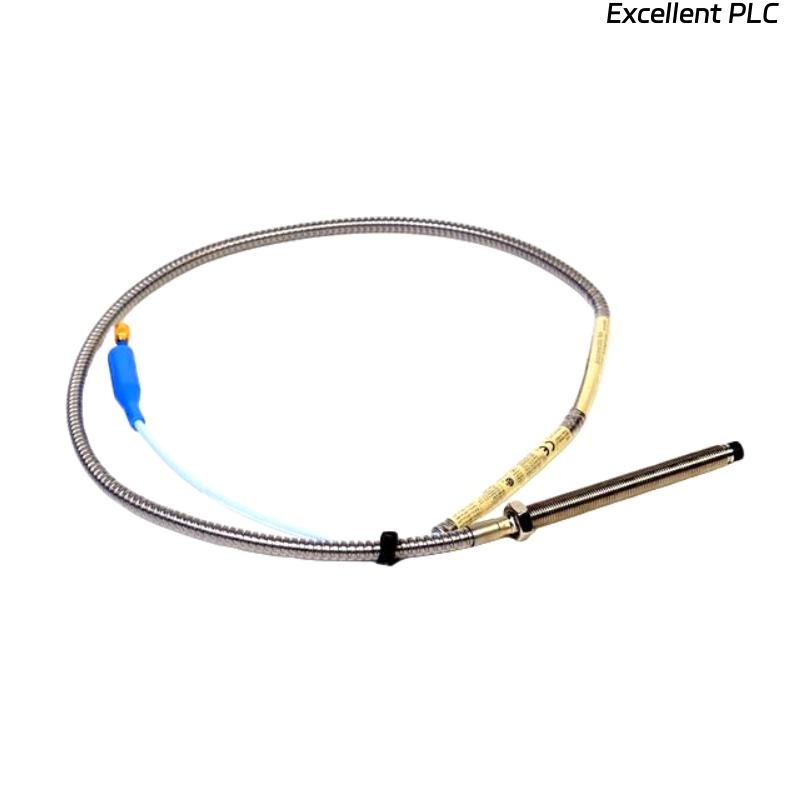
Recently, I encountered a Bently Nevada 330102-00-44-10-11-05 3300 XL 8 mm proximity probe in a turbine installation that had a broken sensor cable. The sensor itself was still functional, but a small section of the coaxial cable had snapped near the connector.
Here’s the step-by-step approach I used to restore the sensor in the field.
Step 1: Safety First
Before touching the sensor or wiring:
-
Shut down the machine and isolate power to the monitoring system.
-
Confirm there is no residual voltage on the PROX input terminals.
-
Use an ESD wrist strap and avoid static discharge near the probe electronics.
Handling the probe incorrectly can permanently damage its internal electronics.
Step 2: Examine the Cable and Connector
I carefully inspected the damaged cable:
-
The outer braided shield was frayed.
-
The inner conductor was broken, exposing insulation.
-
Connector pins and the mounting flange were intact.
It was clear that a direct splice or replacement would be required.
Step 3: Preparing the Cable for Repair
-
Strip about 10 mm of outer insulation from both ends of the broken cable, exposing the coaxial shield carefully.
-
Trim the broken inner conductor to clean copper.
-
Twist the shield braid tightly but leave some slack for soldering.
-
Use a heat-shrink sleeve on one side before joining — this will serve as insulation after the repair.
Step 4: Splicing the Inner Conductor
The 3300 XL probes are precision eddy-current sensors, so signal integrity is critical.
-
Slide a small piece of coaxial coupler or use soldering with rosin-core flux.
-
Tin the inner conductors lightly.
-
Solder carefully to avoid excessive heat (keep soldering iron <350°C).
-
Check that the joint is smooth, with no shorts to the shield.
Step 5: Reconnecting the Shield
-
Twist the shield strands together and solder lightly to maintain continuity.
-
Ensure no solder bridges to the inner conductor.
-
Cover the joint with conductive foil tape if needed, then slide the heat-shrink over it.
-
Shrink with a heat gun carefully — avoid overheating the sensor head.
Proper shielding is crucial; any break here can cause signal noise or failed diagnostics.
Step 6: Testing the Sensor Cable
Before reinstalling:
-
Use a Bently Nevada PROX tester or continuity tester to check:
-
Inner conductor continuity.
-
Shield continuity to connector shell.
-
No short between conductor and shield.
-
-
Connect temporarily to the PROXPAC XL module.
-
Rotate the shaft manually and observe signal response.
If the sensor reports normal displacement readings, the repair is successful.
Step 7: Reinstallation and Calibration
Once verified:
-
Route the cable along its original path, avoiding tight bends (<3x cable diameter).
-
Reconnect to the PROXPAC XL module.
-
Power up the system and confirm the channel LED turns green.
-
Run zero and gain calibration in the 3500/3300 XL system to ensure measurement accuracy.
Step 8: Preventive Advice
-
Avoid stress points near connectors; consider strain relief clamps.
-
Inspect sensor cables annually for wear or abrasion, especially in vibration-prone areas.
-
Keep a spare probe cable handy; field splice is a temporary fix and OEM replacement is recommended for critical applications.
Key Takeaways
-
Field repair of Bently Nevada 3300 XL probes is possible, but precision and shielding care are essential.
-
Always verify continuity and signal quality after repair.
-
For critical turbines, consider cable replacement rather than long-term splice to avoid subtle signal degradation.
“A repaired probe can save time, but a properly routed and shielded replacement cable ensures years of reliable monitoring.”